The process started with a couple days of designing our mosaics and cutting the glass. We were planning to use both the dalle de verre and stone together in the pieces. I decided to make two smaller pieces -- one to give to Eileen and one to take home with me.
I had a circular, clear piece of glass that I found somewhere that I thought I'd use in the piece I was taking home with me. I could either cut it up or use it whole and at the beginning I wasn't sure which I wanted to do. I also wanted to make the one for Eileen an expression of faith... but those were the only ideas I had going into the project.
For me the creative process starts with an idea... I never lock myself down with the ideas, I let the work evolve if it needs to. I usually start out with an idea and part of the way into it it will metamorphize into something else... for the most part this has been a good thing. I don't usually wait for a fully-formed idea before I start working on something.
The first day we had mostly greens and purples and blues to work with. We were waiting on a shipment of glass that had reds, yellows, oranges, aquas, and more greens and purples. I decided that I liked the greens and purples that we had on hand and would make my pieces with those colors.
When you cut the glass with the hammer and hardie (and when you distress it with the Blenko hammer) you have to be really careful or you will slice yourself badly... we had to have gloves for the first two days and we could not wear open-toed shoes.
Day one was spent with the design and glass. On day two -- after we had our design ideas and some of the dalle de verre cut up and ready -- we taped clear plastic down on a 2' x 3' piece of 1/2" plywood to make our working areas. I taped my drawings down first and then covered them with the heavy plastic.
We glued the glass to the plastic using Weldbond. Then we build a clay "dam" around the glass. This clay dam controlled the shape of the piece. We also fashioned hanging hardware from heavy galvanized wire and suspended it in the clay at a level that would be centered in the piece.
My two pieces - glass glued down, clay dam built, hanging hardware inserted.
Once this was done we mixed up some Kerabond/Keralastic and filled the piece about halfway up the glass. We added reinforcement (fiberglass mesh and galvanized wire), and added more of the Kerabond/Keralastic.We then covered the entire work with plastic to cure overnight.
Kim's piece with the beginning of the clay dam.
Kim used a copper tube instead of the galvanized wire for the hanging hardware.
Kim used a copper tube instead of the galvanized wire for the hanging hardware.
Kim working on her clay dam.
Here are more of the work being done... I cannot remember who most of these belong to...
This one is Eugenia's - this I know because we were next to each other in the studio...
On the third day we took the clay dams off and cleaned the pieces up. Some of the pieces were not very thick and Sophie was concerned that they might not be thick enough to support their own weight. Those had to be reinforced with additional Kerabond/Keralastic -- which actually made for an interesting affect on the back of the pieces. Since my pieces were smaller and pretty thick they ended up being thick enough so I could go on to the next step -- cleaning...
I had been really careful to keep the Kerabond/Keralastic off of my glass when I was adding it. Even so I had a good amount of clean-up to do. While we were all cleaning, Kim asked if a layer of clay could have been added to the top of the glass before adding the Kerabond/Keralastic to keep the mortar off of the glass. Sophie thought that might be a good thing to try in the future.
After the clean-up I decided to add a layer of colored cement to the surface. I had been cutting up marble as I had time and I had a nice mixture of gold, off-white and a dusty brown marble. I decided to see if I could match the dusty-brown color (with Sophie's help).
Painting on the colored layer on the piece for Eileen.
After adding the colored layer there was more clean-up to do. Eventually I was ready to mosaic the front of the piece. I was concentrating on the piece I wanted to give to Eileen, since it was going to have to be ready on Saturday so I could give it to her that night.
After talking with Sophie I decided to mimic the shape of the purple pieces of glass while following the line created with the green glass. Sophie helped me cut one large piece of stone and distress it (that's the hard part) to fit in between the two smaller pieces of purple glass.
After finishing the stone work Sophie suggested scratching the surface and exposing some of the white layer below... I wasn't sure, but decided to follow her lead. After I did it I think it really made the piece exceptional.
I haven't scratched the second one yet... I'm still thinking about whether or not it will add to the piece.
I might see if I could create a gold wash to paint into the scratches... then I would more seriously consider scratching this one up. I think white scratches might be a bit of a disconnect for this piece but gold might be very good for it.
These pieces are meant to hang in a window or other area where the the light source is from the back some of the time and from the front some of the time. I don't have a photo of Eileen's piece hanging in a window yet. But here's mine:
It's titled Ab Ovo (From the Beginning)
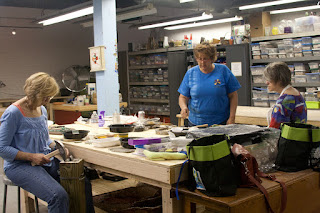
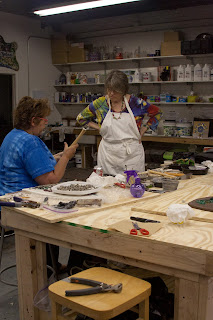
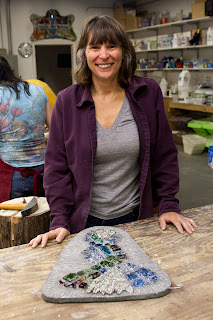
And, to wrap this up, here are some additional photos of everyone working on their mosaics:


1 comment:
Hi!!! I really like much your idea..its wonderful and its so refined.wonderful!!!
I just dont get how its possible that the glass its not in level with the cement... you dont full it untill the botton? you dont cover all? ...jum... Thank you so much!!!
Post a Comment